Hand carved boards.
I have always enjoyed wood carving but have never had a great deal of time to practice and improve my skills.
I was given an off cut of a wooden worktop by a friend and was not sure what I could do with it. Some time later a work colleague was considering the purchase of a personalised board as a wedding gift. The chosen item was an oak board with names and date in poker work, obviously made using a template. I offered to produce a similar item, with no design constraints and to include hand carved details.
The design was agreed, the carving done and a moulded edge cut with a router to add some decoration.
Further lengths of worktop were provided by a kitchen fitter and with Christmas approaching I made boards for our son and daughter, again with hand carved lettering.
Hand carving is a bit like using old tools. Power tools are great for saving time, but I feel they give less satisfaction in the finished article than having produced a piece using tried and tested methods which have been in use for centuries. Unfortunately the time it takes to turn out a couple of hand carved letters I can have made half a dozen boards using my router.


Development.
Hand carving is brilliant but it takes ages to get a board finished, one letter can take several hours so from a commercial point of view I needed to speed up the process.
I was not sure if I could control a router to do freehand lettering, but it seemed the best option to improve the efficiency of the manufacturing process. I found a font which was not too ornate and hoped it would be easy to reproduce with the router.
Next problem was cutter selection. Some cutters have a single blade and as a result the router can very easily go off line. I found a Trend engraving tool with three cutting blades which made it more balanced in use.
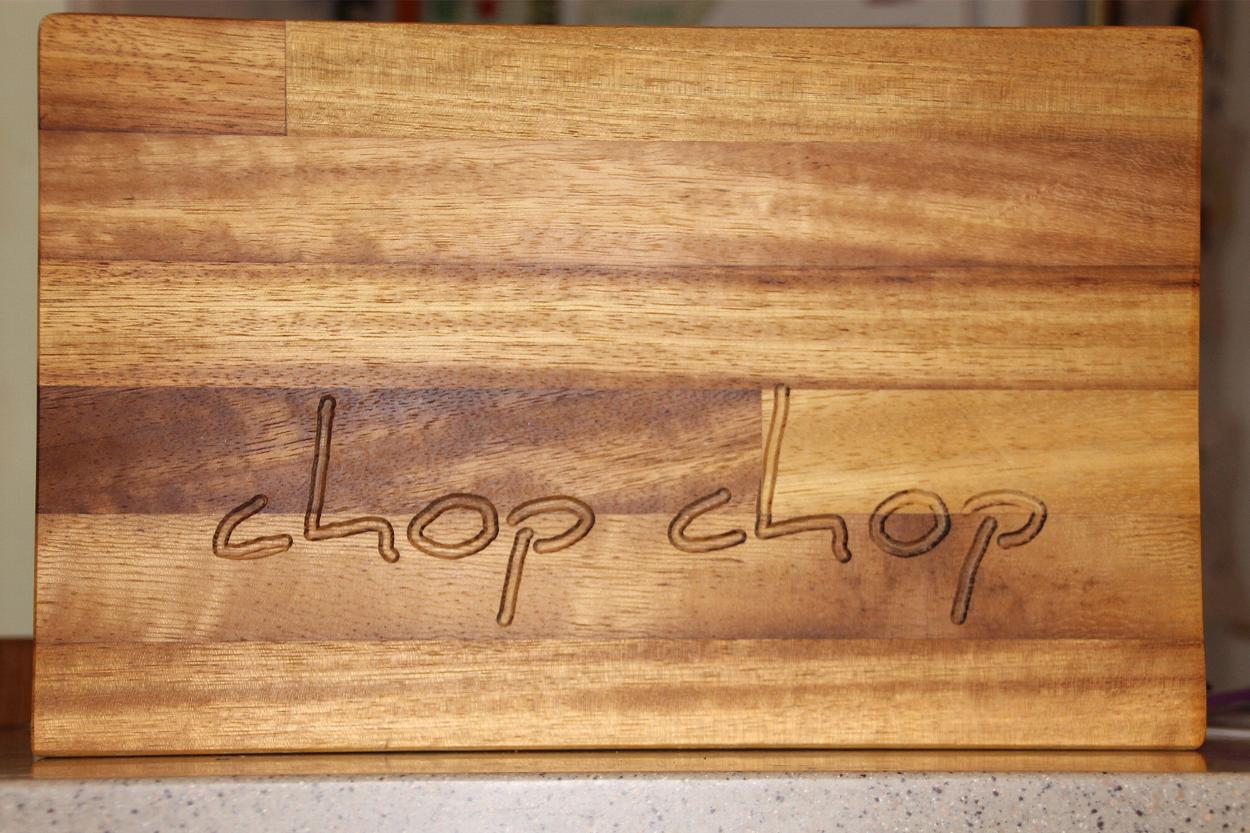
I printed the lettering then transferred the image to a board using carbon paper and 'chop chop' was born. I varied the design by putting the lettering horizontal or diagonal and as an experiment, tried adding a break in the stem of the H and the P to emphasise the wording.
Further development was to make a smaller board with proportionally smaller lettering using a finer engraving tool and completed by back filling with metal powder.
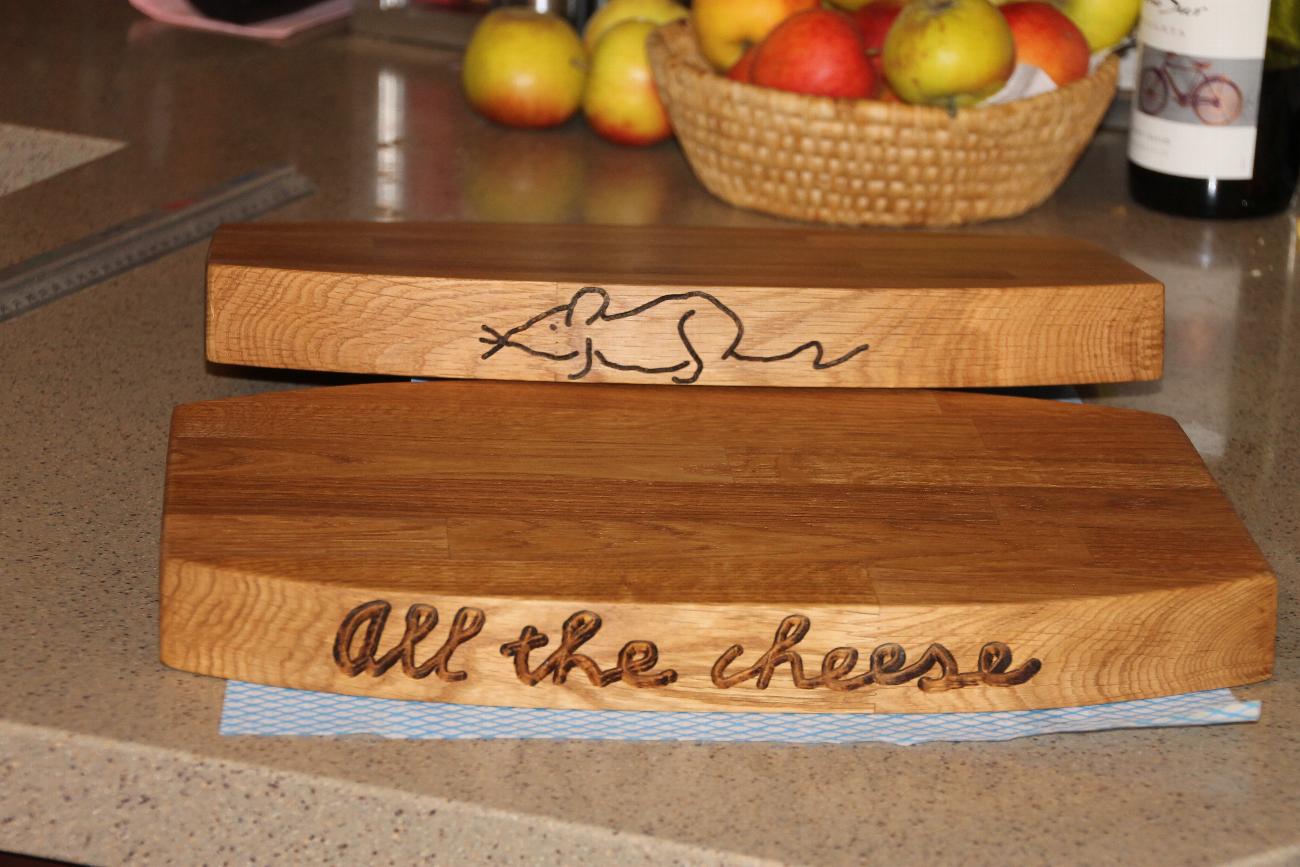
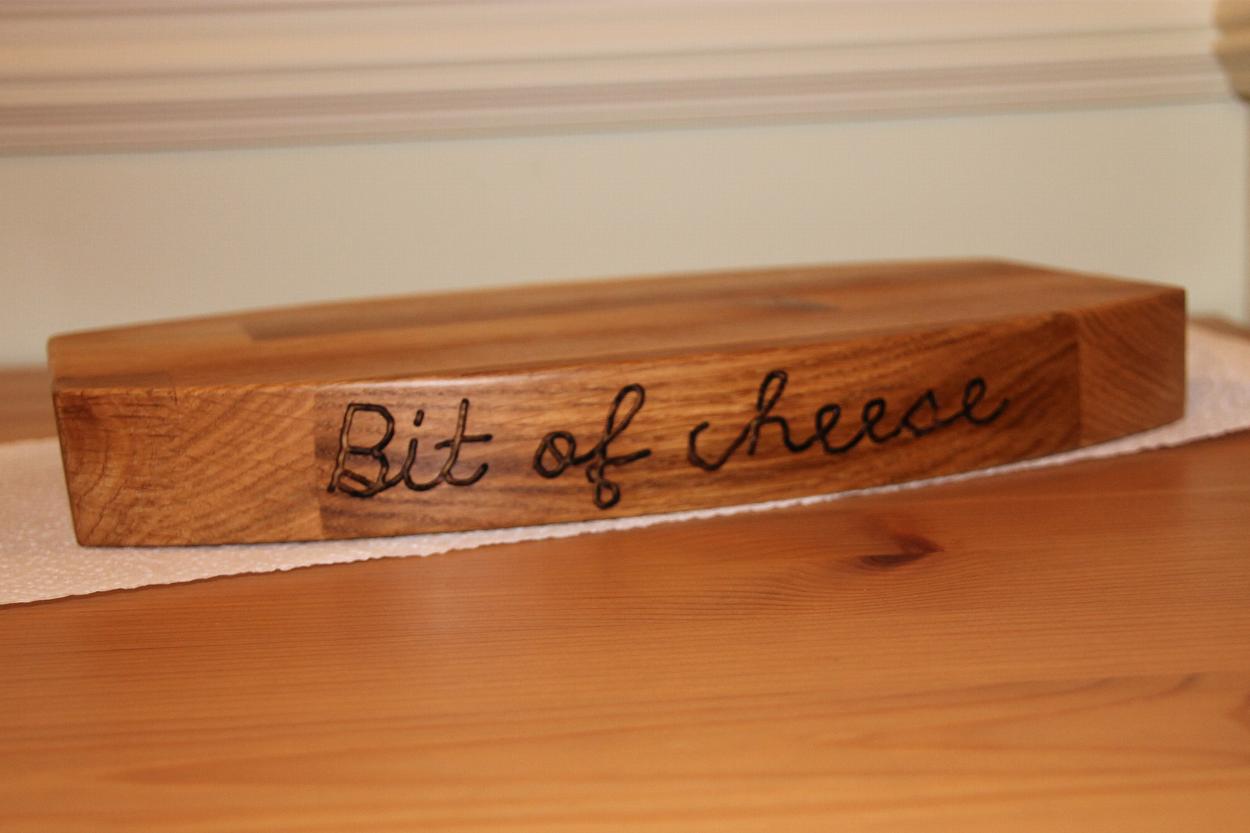
Cheese boards were a logical progression. I made a template which allowed me to make a more ovate shape rather than the rectangle of the chopping board. Large boards had 'all the cheese' cut in one edge and a mouse on the other side, smaller boards had a similar mouse and 'bit of cheese' cut in the other.
The three blade cutter is a game changer. It makes lettering easier than it would be using a one or two flute cutter and i have been able to develop ideas for house warming gifts and garden signs, which has led to a collection of images which can be used to expand the whole range.
Get in Touch
Call 07710 888611, or email mrhwoodwork@outlook.com.